After my successful effort to capture the eclipse in 2017 I was hooked. I made plans to see the total eclipse of April 8, 2024 early. I figured I’d take my full astrophotography rig since it totality would be driving distance from my home.
That was until I went out to practice setting up during daylight. Getting good enough polar alignment to allow me to track the sun during daylight was doable, but it was somewhat frustrating. The thing I learned in 2017 was that the solar eclipse is not a photo opportunity, it’s a once-in-a-lifetime experience. I didn’t want to clutter the experience with the tedium of equipment setup and alignment.
What I optimized for was: keeping the photography simple so I can enjoy the experience of totality. I think I did this somewhat less intentionally in 2017, but that became an overriding concern for 2024.
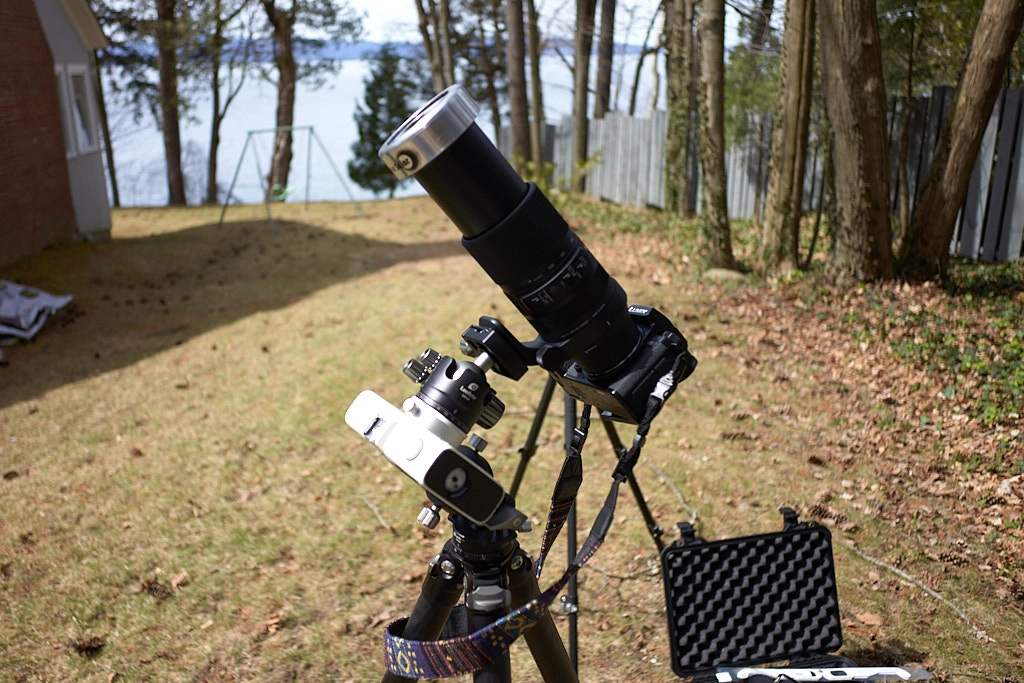
So I fell back on my trusty Vixen Polarie, the little star tracker that could. This timeI used my Panasonic S5II, and Sigma 100-400mm F5-6.3 DG DN Contemporary lens. This is very similar to my setup in 2017.
One brief note on the Polarie and tracking mounts in general: I don’t think they’re required for eclipse photography per se, but they definitely help with the whole keeping the photography simple priority. Through a long lens the sun moves a lot in the sky over three minutes, which is how long totality in Shelburne, VT, lasted. A tracking mount removed, for me, the impulse to fiddle with the ballhead and reframe.
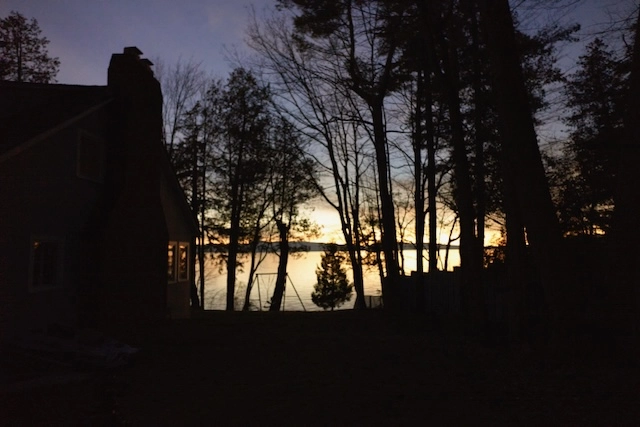
We picked a location in Shelburne, VT, on the shores of Lake Champlain for a weekend trip. It’s a lovely part of the country, but the Adirondacks across the lake were breathtaking. But never more so than while we were in totality, and I could look across the lake and see them emerging from the moon’s shadow.
For the actual photography, I stuck to my basic playbook from 2017, with a couple of minor changes: I wanted to stop down the lens to f/8 to maximize the sharpness and detail from the lens. To accommodate this and keep my exposures consistent with what I captured in 2017, I upped the ISO to 800 from 400. My Panasonic S5II has significantly better noise performance than my Fujifilm X-T2 did, so I wasn’t worry about any increase in noise.
| Phenomenon | Shutter Speed | ISO | Aperture |
|---|---|---|---|
| Chromosphere | 1/8000s | 800 | 8 |
| Prominences | 1/4000s | 800 | 8 |
| Corona 0.1 Rs | 1/1000s | 800 | 8 |
| Corona 0.2 Rs | 1/250s | 800 | 8 |
| Corona 0.5 Rs | 1/60s | 800 | 8 |
| Corona 1.0 Rs | 1/15s | 800 | 8 |
| Corona 2.0 Rs | 1/8s | 800 | 8 |
| Corona 4.0 Rs | 1/4s | 800 | 8 |
| Corona 8.0 Rs | 1s | 800 | 8 |
| Earthshine | 2s | 800 | 8 |
After going through my data from 2017 I decided to target 1/1000s for any exposures of partiality. But I also decided that with a small field of view and no surrounding context, these images wouldn’t be particularly interesting to me. I don’t find these exposures from 2017 compelling. And I wasn’t interested in complicating my setup to capture more context. So, it’s okay if I only use those exposures to test the setup before totality.
Going through my checklist, I also considered external power supplies (extension cords, massive batteries, the like), but decided against it. These would be one more thing to set up, and one more thing to get right. Easiest just to make sure I have fully charged batteries for the camera and the Polarie.
⚠️ For any photography of the sun outside of totality itself a solar filter specifically designed for observing the sun is absolutely required. I keep seeing advice around the internet to just use ND filters. This is wrong and dangerous.
Here’s my checklist for 2024:
Before eclipse:
- Make sure camera battery is fully charged
- Make sure Polarie batteries are fully charged
- Set up tripod and Polarie
- Hook camera bag onto tripod for stabilizing weight
- Align tripod and Polarie to celestial north pole
- Put camera and lens on Polarie
Set up Camera
- Set camera to manual focus
- Set camera to manual exposure
- Set camera drive mode to self timer
- Set self timer drive mode option to 2s
- Set camera to exposure bracketing
- Set exposure bracketing to 7-1
- Set camera ISO to 800
- Set lens aperture to 8.0
Prepare for exposure
- Set Polarie to sun tracking
- Put solar filter on lens
- Position camera the sun
- Zoom lens to 400mm
- Focus the lens on the limb of the sun
- Put solar glasses on face
- Set initial shutter speed of 1/1000s
Partial eclipe
- Expose at 1/1000s
- Gawp
- Repeat as desired for stages of partiality
Totality
- Remove solar glasses from face
- Remove solar filter from lens
- Expose at 1/1000s
- Expose at 1/30s
- Expose at 1/2s
- Gawp
- Expose at 1/2s
- Expose at 1/30s
- Expose at 1/1000s
- Put solar filter on lens
- Put solar glasses on face
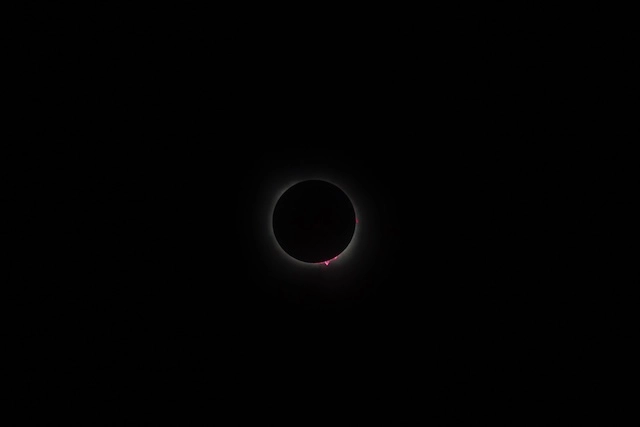
2017 was a year in which the sun was at a low point in its solar cycle — this year was very different, and that was almost immediately apparent. There were massive prominences visible to the naked eye on the lower limb! This was shocking to me, wholly unexpected in the midst of an altogether unusual experience.
And because I kept it relatively simple, I was able to capture it to my satisfaction, achieve my array of exposures, and have plenty of time to take in the full experience of being present in the world under the shadow.
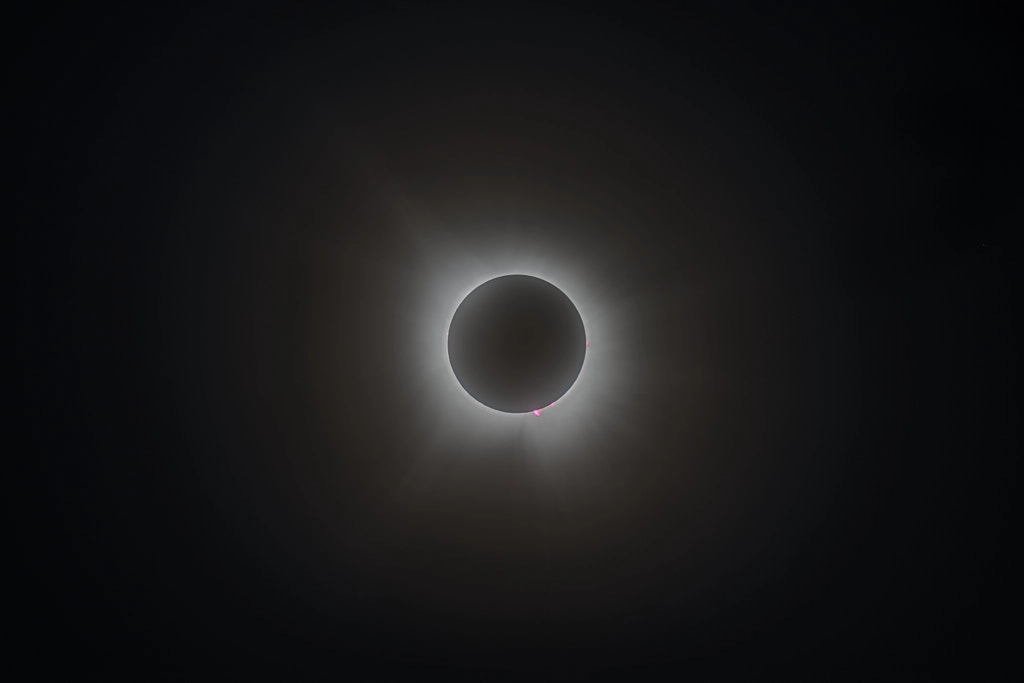
I composited 2024 differently than 2017; in 2017 I was struck by the visibility of the bright star Regulus in the frame with the sun, and that’s what I wanted to highlight with my editing — that star visible during the day while our star was obscured. This time it was that set of prominences that I wanted to highlight.
And here’s the result:
I’m already planning 2026.